PAGE ONE - MAKING BINDING AND SEWING THE 1ST SIDE TO THE QUILT.
I have had many questions in classes and lectures and online about how to do bindings. There are many ways and this is not the only way I do it. But this is how I mostly put binding on a quilt for a class or a show:
Usually I cut crosswise strips of the fabric I wish to use at 2.25". The width you select will depend on the width of your seam allowance to sew the binding on, the thickness of your fabric and batting. With a full 1/4" seam and standard cotton fabric and cotton batting, 2.25" works for me. I cut the number of strips that it will take to go around the quilt plus 10" for overlap and another 10" for mitering corners and seams.
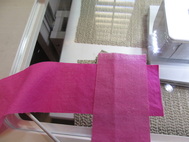
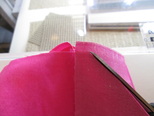
Seam the strips into one long piece by seaming on the diagonal, end to end, to make one long strip. Place one strip right side up on the bed of the machine and the second strip vertically at the far right end of the first strip, making an "L" shape. Here I have the selvedge ends extending beyond the edges, where they will be cut off.
Sew from one diagonal corner to the other. If you are more comfortable marking first, then do so, but I never do. Start sewing where the fabrics cross and sew off the opposite end where they cross again.
Lay the opposite end of the 2nd strip, crossed with the third strip, just like the first 2 strips, place them right next to the end of the first seam and sew across it in the same manner. Continue to sew strips end to end until all the strips are connected into one strip.
Trim off the corners, leaving a 1/4" seam allowance, and cutting the threads between the seams.
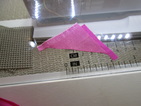
These are what the corners I cut off look like.
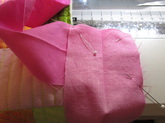
Take the long strip of fabric to the ironing surface and press lengthwise wrong sides together, working from one end to the other.
I press the seams open as I come to them and then continue to press the wrong sides together.
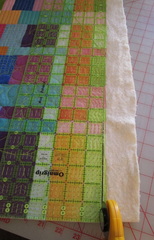
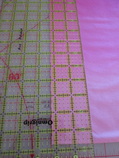
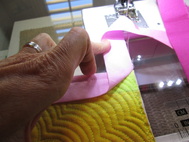
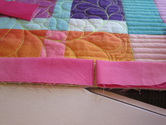
I like to trim the quilt before I sew the binding onto it. I have straightened the edge and squared the corners. Make sure to leave a 1/4" seam allowance to sew on the binding without cutting off points of patchwork or motifs of quilting.
This quilt is quilted heavily clear to the edge, but if the edge is loose, I like to zigzag the edge to hold the layers together so that the layers don't curl as you turn the binding.
This quilt is quilted heavily clear to the edge, but if the edge is loose, I like to zigzag the edge to hold the layers together so that the layers don't curl as you turn the binding.
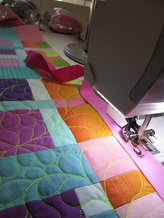
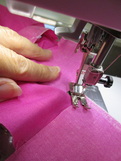
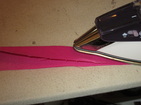
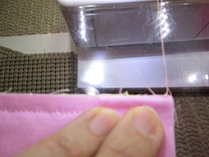
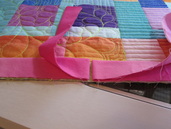
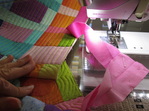
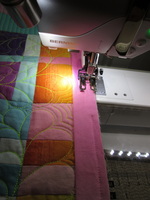
Start to sew the binding to the trimmed edge of the quilt, matching edges of the binding to the edges of the quilt. I sew with a walking foot to make sure all the layers feed evenly, and I do use a 1/4" seam allowance. I leave approximately 12" of binding unsewn at the beginning. Start in the center of any side.
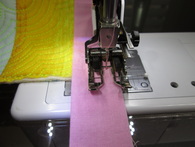
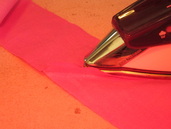
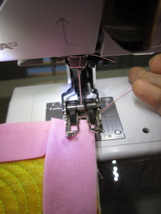
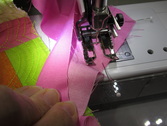
Sew until you are 1/4" (or the width of your seam allowance) from the edge of the quilt. I have placed a pin across the end so I can easily see where the end is. If you need to mark the 1/4" line, then do so. Stop with the needle down in the fabric exactly 1/4" from both edges of the quilt.
Then I turn the quilt on the diagonal and stitch off the quilt corner, so there is a very short diagonal stitching line. and the quilt is free of the machine.
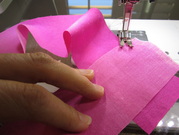
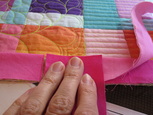
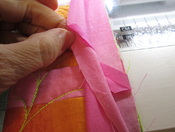
Pull the quilt away from the machine and fold the binding straight up from the next edge of the quilt. This folds the binding on the diagonal and continues the straight line of the edge of the quilt. Finger press the diagonal fold line.
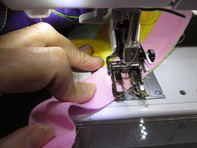
Now fold the end of the strip down to match the edge, folding exactly at the edge of quilt. The thread from the diagonal seam is still attached to the machine and I now hold onto the loop of thread and pull the fold back under the needle.
Here I am holding the loop to help get the stitching started with all the thicknesses. I start stitching at the edge and sew the entire side, stopping exactly 1/4" from the next edge.
Continue around the quilt. Stopping at least 12" from the beginning of your stitching. Cut the thread and pull the quilt away from the machine.
In the center of the unstitched area, bring the ends together. I fold the ends up, leaving about 1/8' of a gap. If using bias binding you may want to leave 1/4" or if using lengthwise grain binding, you may want the ends to meet. The gap allows for a slight "growth" of the binding as you sew and I find leaving the gap allows the binding to have no tucks when done.
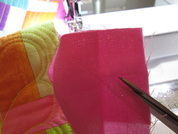
Trim one edge exactly at the fold line. Here I have trimmed the left side, but it could be either one.
Take the cut off end and use it as a measuring tool to cut the other end. You want the second end to be exactly the width of the binding bigger than the first end. Using the actual binding ensures the length will be correct. Be careful to only cut the folded back end off, not the bottom layers of the binding.
Here are the two ends cut and ready to sew.
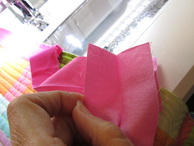
Now open out the 2 ends flat, being careful not to twist either end, and place in the same "L" configuration used to sew the strips together, but place the edges exactly together.
Here are the two ends placed together. I place one pin at the corner to hold the strips together in the proper place.
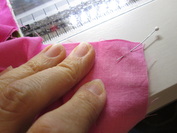
Then I place one pin from the upper left corner diagonally toward the opposite corner.
And a third pin at the lower right corner. Since the underside corner is hidden from view by the top layer, I use this pin to exactly find the corner and to know where to sew off the edge.
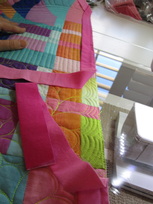
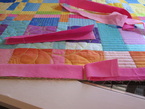
At this point, straighten the binding out and match it to the edge of the quilt to make sure that the binding isn't twisted and fits the quilt.
At this point, straighten the binding out and match it to the edge of the quilt to make sure that the binding isn't twisted and fits the quilt.
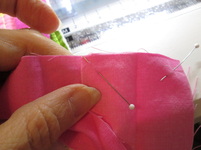
This is all the "marking" I do, but feel free to mark this line if you want. Now I will sew from corner to corner. I sew slowly enough that I can pull out each of the 2 pins along the seam line as I come to them.
Notice how I have folded the quilt to give myself enough room to maneuver the binding easily. This picture is immediately before sewing.
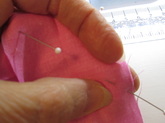
Here is a picture of sewing this seam.
Trim off the excess fabric at the corner, leaving a 1/4" seam allowance.
Press this seam open, too. I usually finger press at this point, and pull the binding out to check that is isn't twisted and fits well.
Sew from the end of where you stopped the stitching to the beginning of the stitching attaching the binding to the quilt. Stitch over the previous stitching at both ends for 1/2" or so and trim off threads. Press the seamed area flat.
Sewing the fold to the back is covered in Part 2.
Sewing the fold to the back is covered in Part 2.
