Bias Binding Tutorial
|
I demonstrated this technique at The Quilt Show booth during the Houston Festival of Quilts in November of 2014. Here is a tutorial of how to make bias binding 3 different ways.
|
Bias binding can be very useful and necessary. For instance, if you need to bind a curve a bias binding is necessary. However, they can also be purely decorative. Plaids and stripes, when cut on the bias give a lovely diagonal look that can be the "icing on the cake". Bias binding is also more enduring than straight binding and can give a smoother, more beautiful finish to your quilt.
Traditionally, there are 2 ways to get a length of bias to make a binding or a piping or other trims. These are cutting the strips and seaming them together, or doing a "Continuous Bias" which is marked, seamed together and then cut with scissors. You may have tried one or both of these methods and found that they had steps that seemed hard or to take too long to be worth the trouble. I actually use a third method that is a combination of the best of both methods in my estimation. In this tutorial I will show all three methods and let you choose which one you would like to try.
A note about sizes: Most bias strip instructions tell you to start with a square. Since quilters seldom have fabric in squares, I want to let you know that squares are fine but rectangles are just as easy. Since yardage is a rectangle and fat quarters are rectangles why not start with a rectangle? But what size should the rectangle be? There is a simple formula here: the width of your strip times the length of the bias needed. In these pictures I am cutting 2" wide strips but you might use 2.5" or 2.25" or for piping even 1.5"- whatever width you need. Then measure whatever you are putting the bias on - in most cases this will be the perimeter of your quilt. For instance a 40" square quilt will be 160" (40" +40"+40"+40"= 160"). To that length you will want to add at least 10" for the corners and enough to finish the ends. I often add 15" but I'm very cautious.
So in my hypothetical example I would have 2" x 175" (160" + 15") = 350". That is the total number of inches you need, but how big is the piece of fabric? Divide your answer (mine was 350") by the width of your fabric. Selvedge to selvedge I usually figure 40". So 350" divided by 40" is *8.75". Even rounding up to 9" would mean a very long skinny strip. But if you made the width 20" (cutting the fabric along the fold), then it would be 18" x 20". Or basically a fat quarter!
But I know most of us are not just super excited to do math - So let me tell you the simpler way to approach this. If your pattern tells you you need 1/4 yd of fabric for binding, if you are doing continuous bias binding, you will need the same amount since you are using every square inch. Of course a quarter yard is the same amount of inches whether it is 9" x 40" or 18" x 20". Long skinny strips are hard to work with in this method, but 9' is doable. The samples I am using in the Traditionally Cut Strips and Continuous Bias Technique are 9" x 20"". In the third combination method, I am using a 18" x 20" fat quarter.
When cutting Traditional strips you will want to add 4" to the length or width to make up for the waste of not using the corners.
Traditionally Cut Strips:
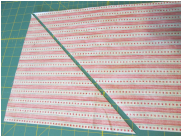
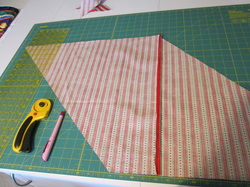
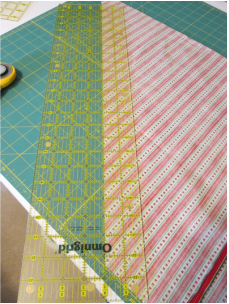
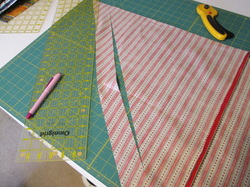
If you start with a square you can simply cut diagonally from corner to corner. But with a rectangle, line up your 45 degree line on the ruler with one edge, and place the edge of the ruler in the corner of the fabric and cut.
If you start with a square you can simply cut diagonally from corner to corner. But with a rectangle, line up your 45 degree line on the ruler with one edge, and place the edge of the ruler in the corner of the fabric and cut.
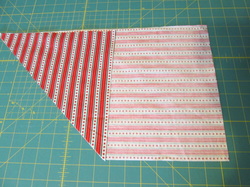
Here is the piece after the first cut.
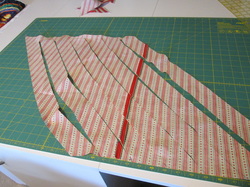
You can simply cut strips from each section, but it is faster to flip one on top of the other, carefully lining up the bias edge, and cut both at once.

Line up the 2" mark along the bias edge you just cut and cut strips across the diagonal. (Of course use the 2.5" line or any other mark depending on the size of strips you wish to cut.)
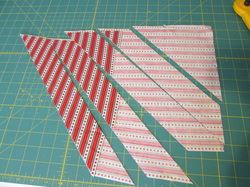
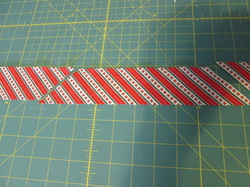
Here are all the strips after cutting. Notice that the corner isn't cut. When the strips get too small to work with I stop cutting. This does result in some waste - a drawback to this method. But that also means there are fewer seams.
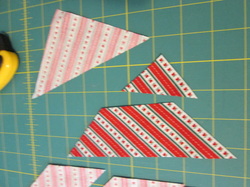
These are the pieces I wouldn't bother to use when I am cutting bias strips.
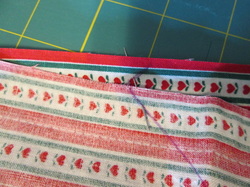
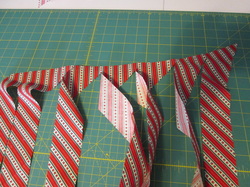
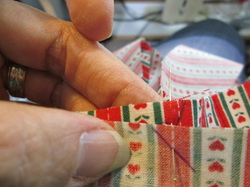
Now all these strips need to be sewn together in bias seams
When sewing these seams, the edges need to be offset exactly 1/4". The little "dog ear" of fabric at the top and bottom need to be equal and the same width as your seam line. I have been sewing for these for at least 45 years but still....
They are seldom perfect. It takes awhile to line each one up and then more time to redo the bad ones.
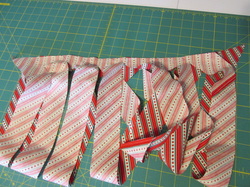
I find this technique useful when I only have a few strips to sew together. A small quilt or a quilt that I am binding with strips from several different fabrics, are examples of when I might use this technique.
But it does take more time to match seams and it does waste some fabric. I got 2-1/4 yards of binding from my 9" x 20" piece of fabric.
Continuous Cut Bias
Continuous cut bias is the next common technique, and I was thrilled when I first discovered how to do this in 1982. I means that you use every square inch of the fabric, and since you sew all the seams at once before cutting, there was no tedious matching to worry about. Here is the basic technique:
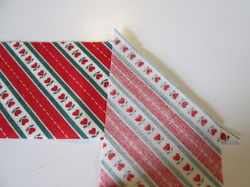
Start in exactly the same way as you would if cutting individual bias strips. Cut your fabric on a 45 degree angle by lining up the 45 degree line on your ruler to one edge of your fabric and cutting from from the upper corner to the lower edge of the fabric. (On a square, you cut from corner to corner.)
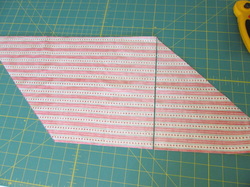
Take the corner piece you just cut off and put it on the opposite end of your fabric. The fabric shape that results is a parallelogram. If you have a trapezoid (with the 2 bias edges slanting toward each other and narrower at the top than the bottom), then it won't work. Just move the triangle to another edge.
Place the fabrics right sides together, matching the straight edge, and sew in a 1/4" seam. It won't match at the tip of the triangle - that's OK!

Press the seam open. I press all seams in binding open, otherwise you can get a very lumpy binding!
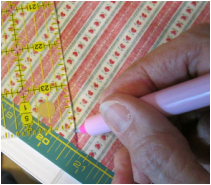
Now you will need to find a marking tool that will show up easily on your fabric. I prefer one that comes out easily, because handling a bias edge can be tricky. They stretch out very quickly. Here I am using a SewLine Air Erasable Pen. It will fade in an hour or two, so you need to know you have enough time to finish your binding if you use an air erasable marker.
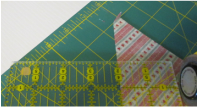
Line your measurement (here I am using 2") along one of the bias edges and mark a line parallel to it across the fabric.
Line your measurement (here I am using 2") along one of the bias edges and mark a line parallel to it across the fabric.

Continue marking every 2" across the entire piece of fabric. Here I have come to the opposite edge. Usually you will have a strip at the edge that is too narrow to use. Simply trim it off.
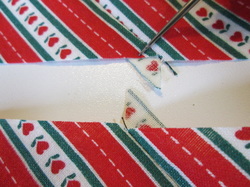
Now you need to sew the seam. Fold up one straight of grain edge to meet the other, right sides together. However, you will need to offset the edges by one full strip (in this case 2"). Here you can see one strip extending beyond the opposite edge.
You need to match each of the marked lines to the one offset on the opposite edge. I place a pin at 1/4" from the edge along my line and then have the pin come out at the 1/4" line on the other edge on the line. Here my markings are all on the wrong side, but I transferred the line to the right side so that you can see where the pin is intersecting the drawn lines at the seam line.
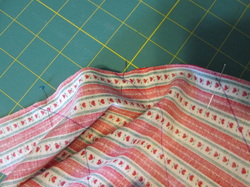
Once all the lines are pinned together at the edge, you will have a twisted, distorted looking tube with one strip sticking out at each end. This one is particularly distorted because my fabric is only 9" wide. Bigger pieces are easier to handle.
If you pull the tube so that it lies flat, your pinned seam will go diagonally around the tube. This is exactly right!

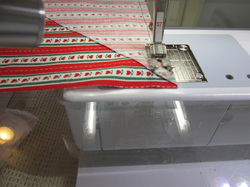
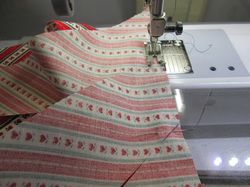
Now sew the 1/4" seam down the whole length of the tube.
This shows the end of the seam where it crosses the seam with the triangle. This is basically how it will look (though I hope your seam line is a little straighter than mine!)
Now you have all those pesky little diagonal seams sewn in just one seam. But you still need to cut it into strips. Scissors are the only way, so simply cut on the marked lines around and around the fabric.
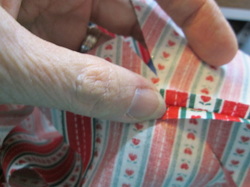
This last seam has not yet been pressed, so when I cross it, I open it up and cut across, continuing from one marked strip to the next in a smooth line. If you do this it will eliminate all those little "dog ears" along the edge of your binding.
Here is my binding with the seams all pressed open. I would usually just press the seams open as I was folding the strip in half lengthwise to make my binding. I got 2 yards and 14" of binding from my 9" x 20" piece of fabric using this method.
I love this method all except for the scissor cutting step. It is less accurate and if I am doing a large quilt, it very hard on my hands.
So shortly after I learned this method, I decided to combine the two methods. So here is my Rotary Cut Continuous Bias Method.
Rotary Cut Continuous Bias Binding
You will start the exact same way as Continuous Bias. Cut a 45 degree diagonal line across the fabric from the corner to the opposite edge, move the triangle to the other side to make a parallelogram, and seam the fabric right sides together in a 1/4" seam. Press the seam open.
You will need your long ruler, a marker and rotary cutter. I am using the SewLine Air Erasable Pen, but I often use a pencil. You won't have nearly as much marking for this method.
You will need your long ruler, a marker and rotary cutter. I am using the SewLine Air Erasable Pen, but I often use a pencil. You won't have nearly as much marking for this method.
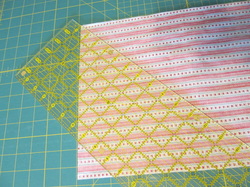
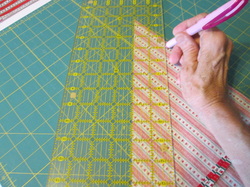
Place your ruler with the 2" (in this case) line along the bias edge you just cut.
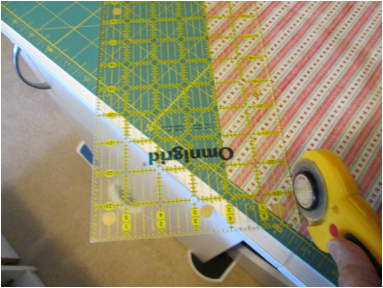
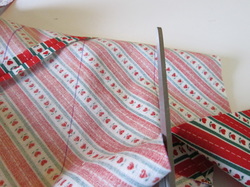
Pick up your rotary cutter and starting at least 1/2" in from the straight edge, (leaving at least 1/2" uncut, in other words), cut along the ruler.
Stop cutting about 1/2" from the opposite edge! See photo below.
Stop cutting about 1/2" from the opposite edge! See photo below.
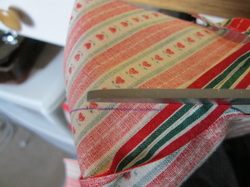
This is where I lift my cutter from the fabric. Put the cutter aside.
Now pick up your marker, and mark along the edge of the ruler in a continuous line with the cut you just made - at the top and the bottom of the fabric.
This is what it will look like.
Continue across the fabric, cutting the strips except at the top and bottom, but marking the lines for each strip across the top and bottom. I gently pull the recently cut strip so that I can easily see the previous cut edge to line up my ruler each time, without disturbing the uncut part of my fabric.
If your fabric is wrong side up (like mine), you will need to carefully turn it over so the right side is facing up.
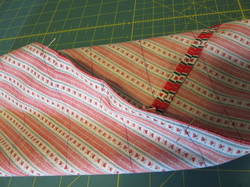
Now bring the lower edge to the top and match the straight edges together. Offset the ends by one strip - just like in the continuos bias binding above, but this time your strips are already mostly cut.
Once again match all those offset seams - just like in the regular continuous bias.
And sew the seam. This always reminds me of a hula skirt at this point!
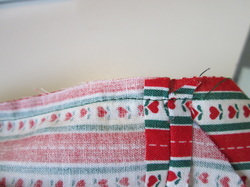
Now you will need to cut across the seam from one rotary cut line to the next. I hold the seam open as I cut. It makes the cutting easier and gets rid of the "dog ears".
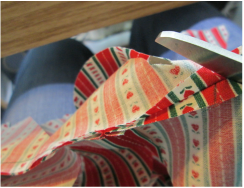
Here I am cutting.
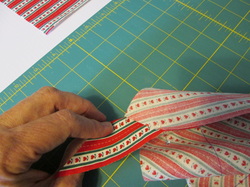
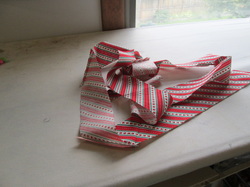
Once this is done you will have a lovely pile of bias binding, ready to be pressed and used.
Once this is done you will have a lovely pile of bias binding, ready to be pressed and used.
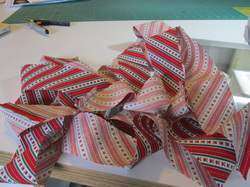
Here is my pile of binding.
I have 4-3/4 yards of 2" binding from my 18" x 20" fat quarter.
You can try lots of fun things. Use straight or decorative stitches on your fabric and then cut it into continuous bias. Or piece strips together for your fabric piece for a scrappy continuous bias. I hope you enjoy this technique!
I have 4-3/4 yards of 2" binding from my 18" x 20" fat quarter.
You can try lots of fun things. Use straight or decorative stitches on your fabric and then cut it into continuous bias. Or piece strips together for your fabric piece for a scrappy continuous bias. I hope you enjoy this technique!
